How to Build a DIY Closet System from Plywood
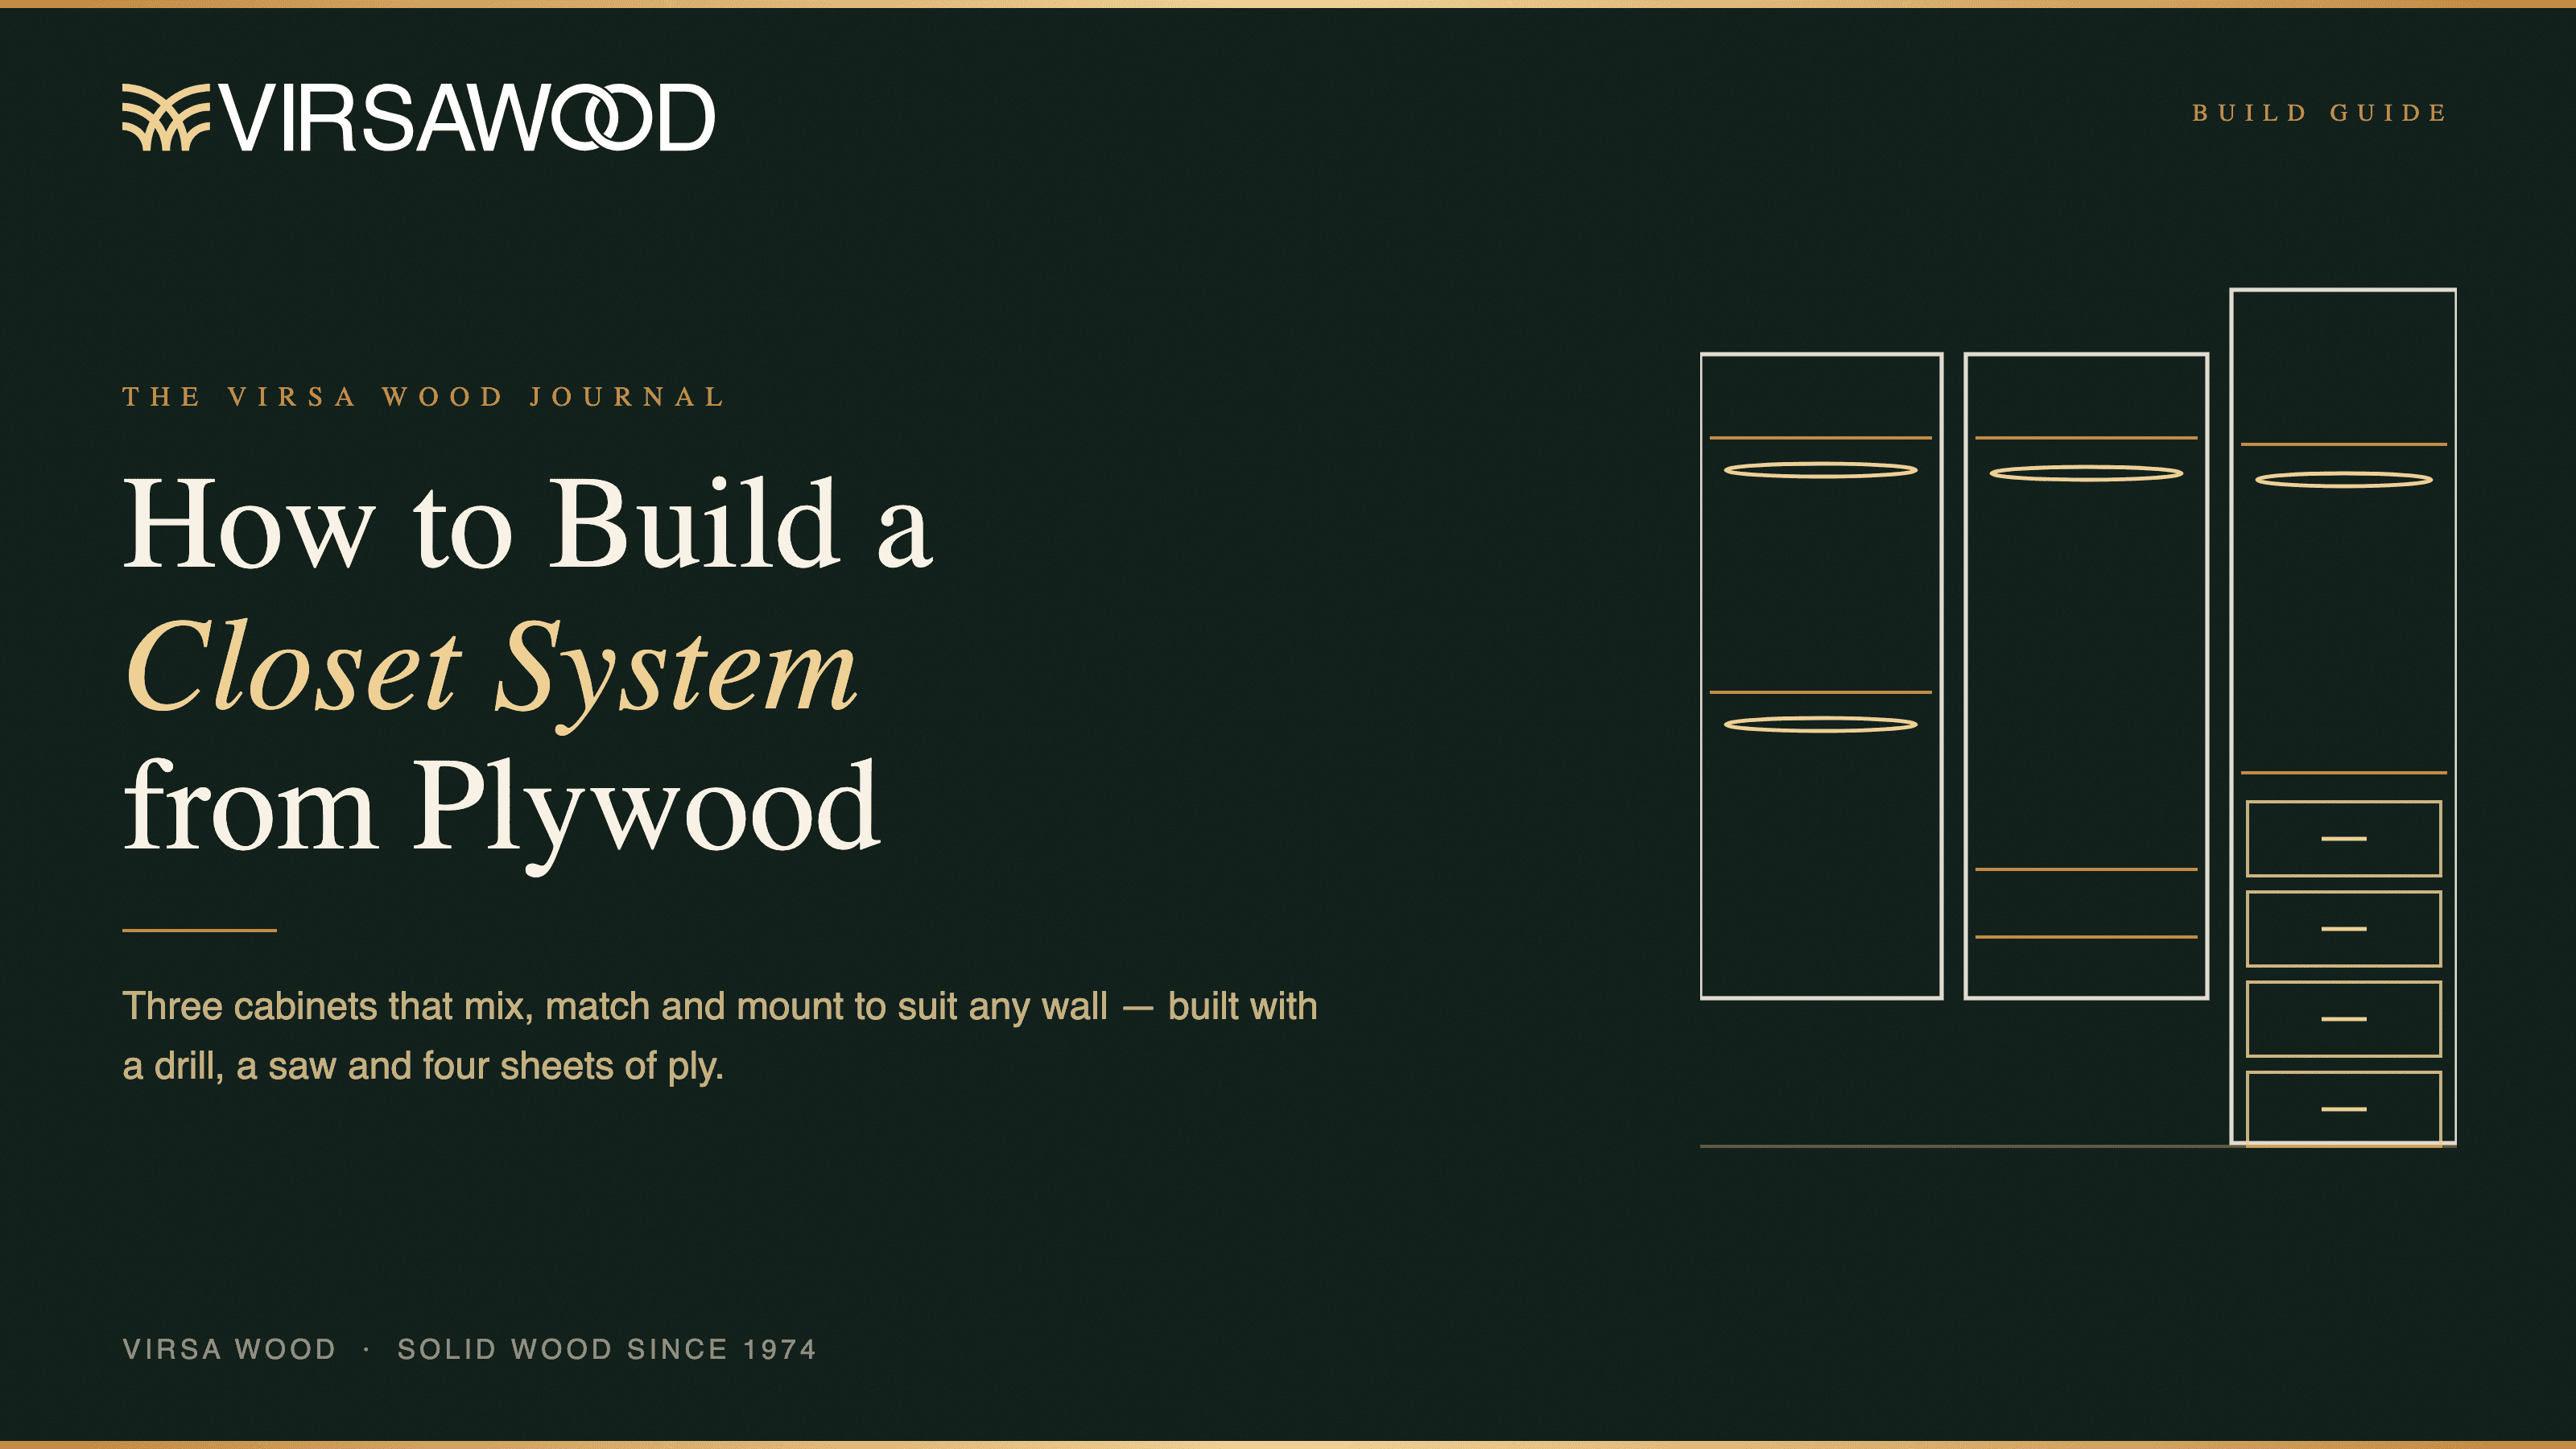
Three cabinets, four sheets of plywood, and a wardrobe that actually fits the wall you have.
Ready-made wardrobe systems are expensive for what they are, and they are almost never the right size. You end up with a gap at one end, a rail at the wrong height, and a box that had to be assembled in the room because it would not go through the door.
Building your own solves all three problems at once. This is the system we build most often, broken into three separate cabinets. Each one works on its own, and together they cover almost any wardrobe layout.
What to know before you start
The system is three separate boxes:
a wall-mounted cabinet with two hanging rails, one above the other
a wall-mounted cabinet with one long hanging section and shelves
a floor-standing cabinet with drawers, hanging space and a shelf on top
They can go side by side, or split across two walls, or you can build just the one you need. Nothing about the design assumes the other two are there.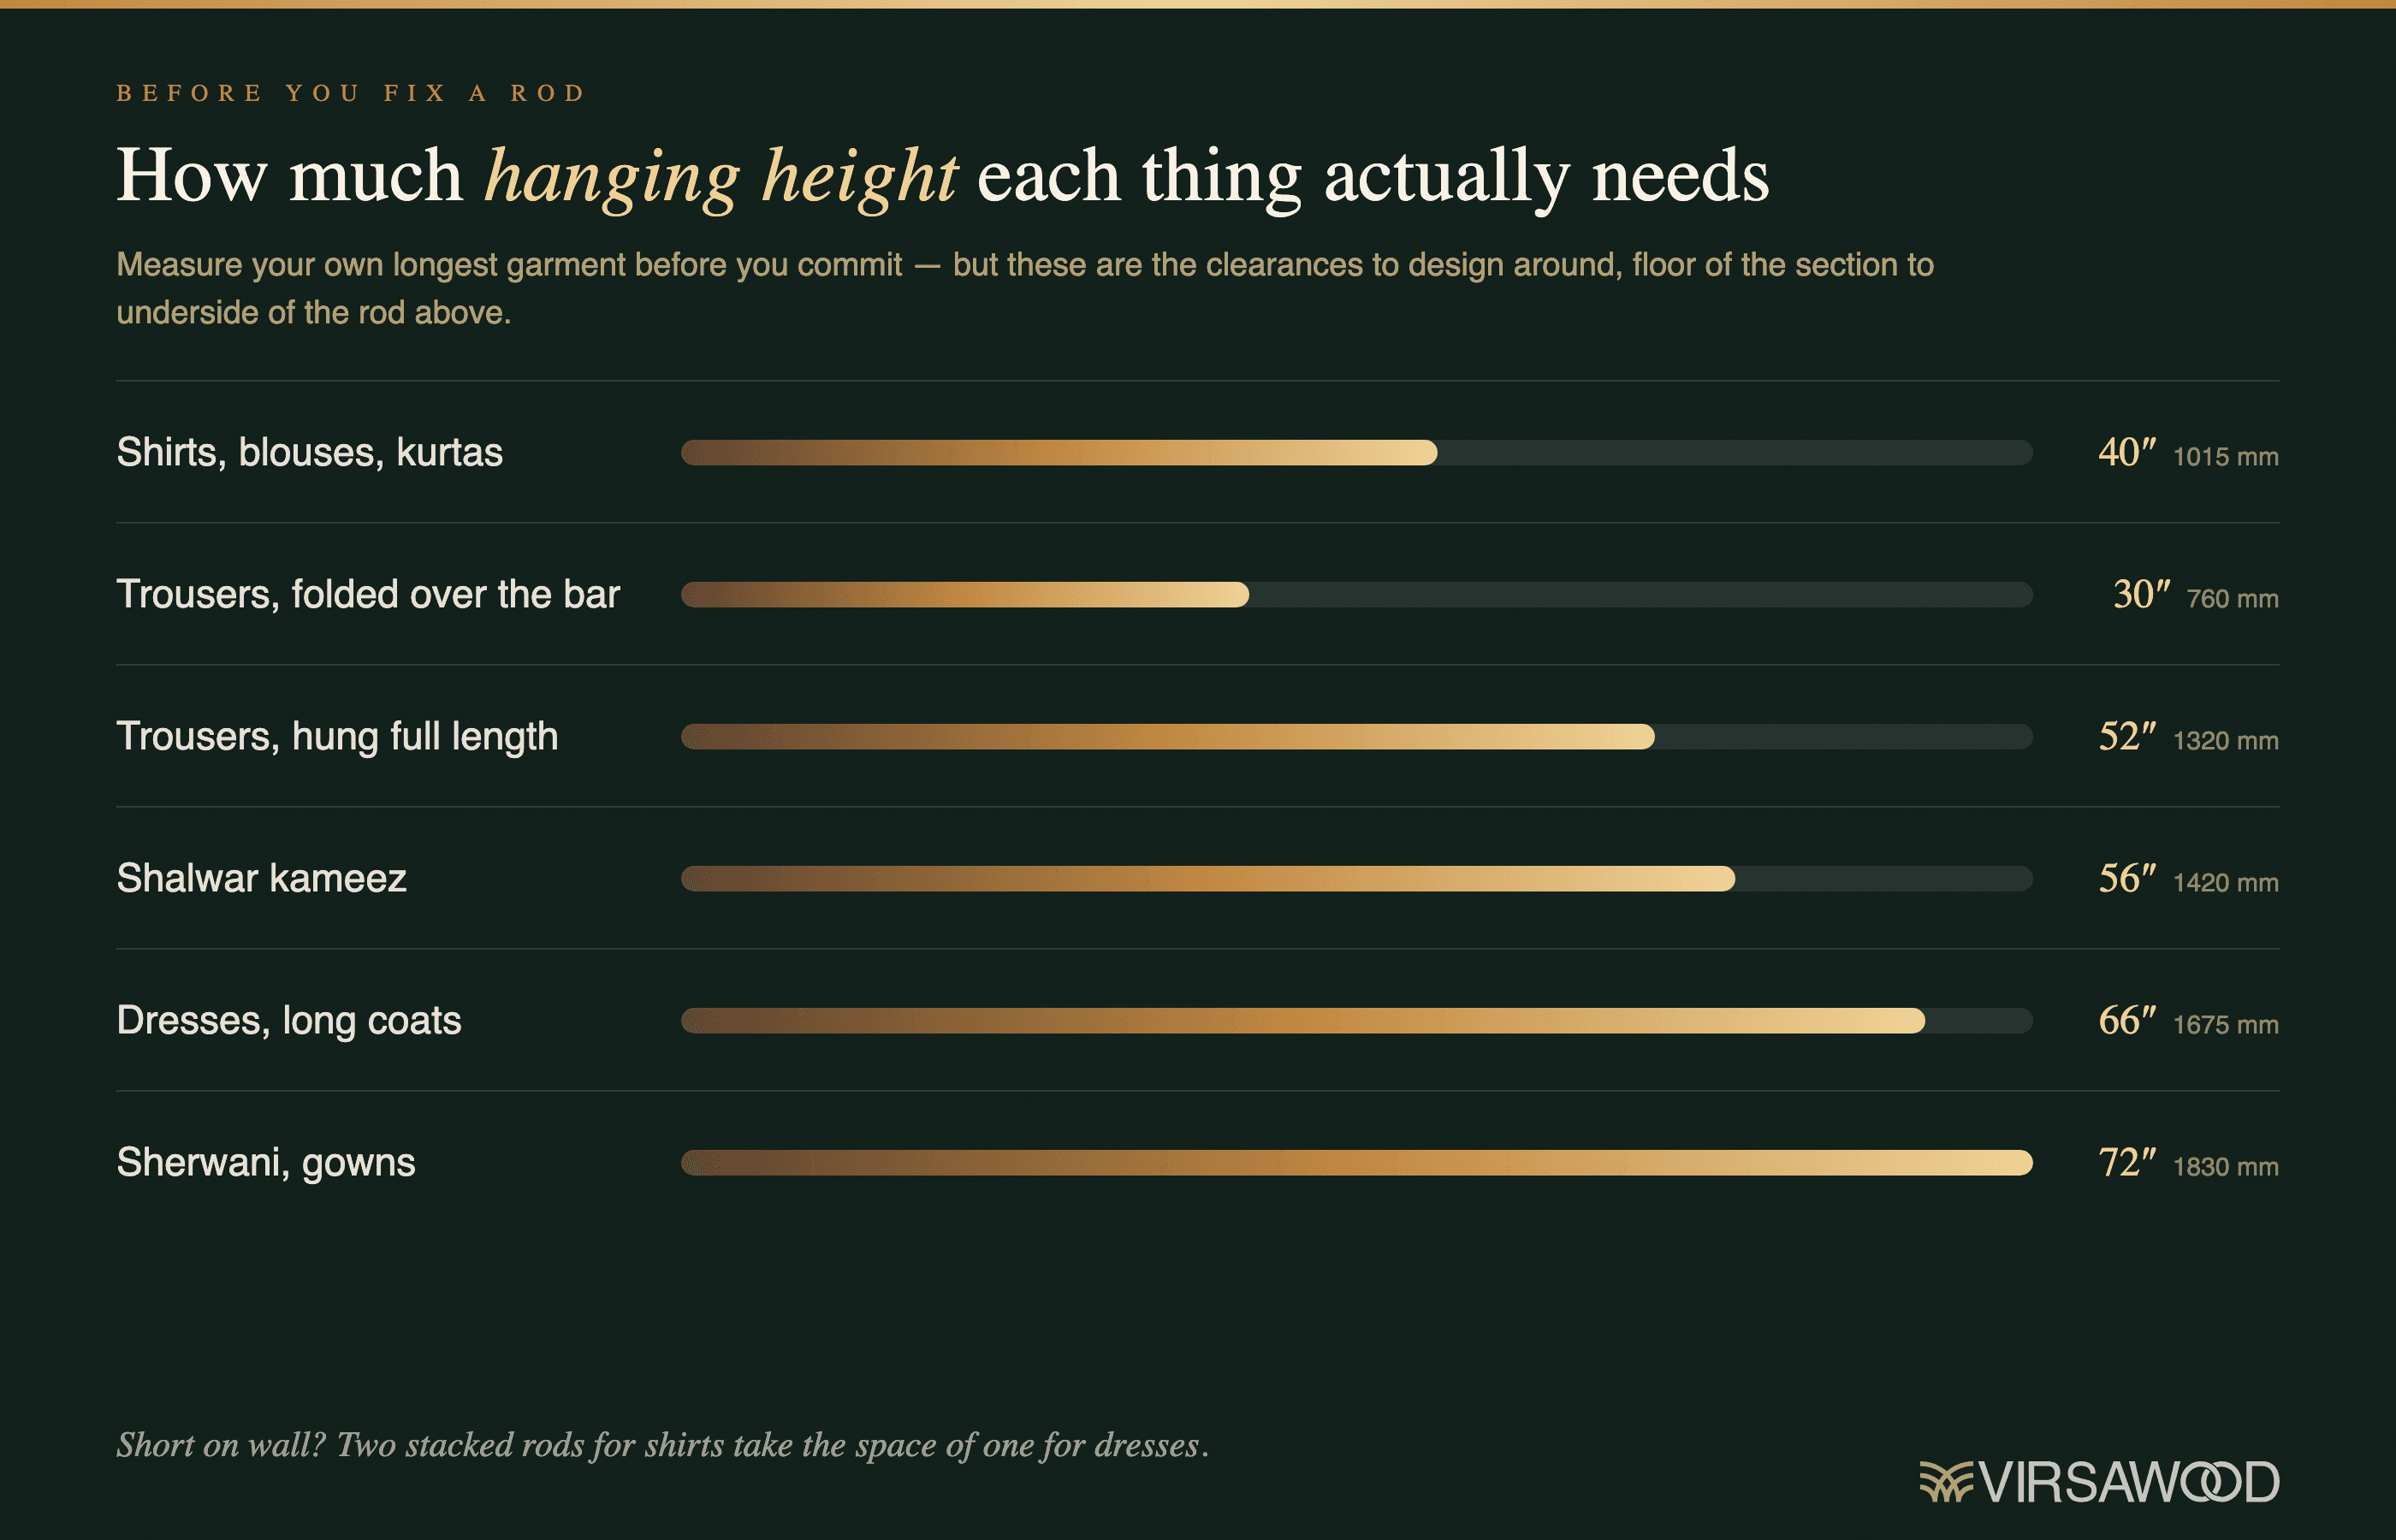
As drawn, all three finish at 84″ (2134 mm) from the floor and are 15¾″ (400 mm) deep. That depth is not arbitrary: a shirt on a hanger sits about 22″ (560 mm) wide across the shoulders and needs roughly 24″ (610 mm) of clear depth to hang square. At 15¾″ you hang across the cabinet rather than front to back, which is why the rails run left to right.
Widths are up to you. That is the entire advantage of building it yourself, so measure the wall before you cut anything.
Two of the three do not touch the floor
The double-rail cabinet and the hanging-and-shelves cabinet are fixed to the wall with a clear gap underneath. That is worth doing for three reasons: you do not have to cut away the skirting, you can sweep under them, and they use less material because there is no base or plinth to build.
The drawer cabinet is the exception. Loaded drawers are heavy and the weight is all cantilevered off the front, so that one sits on the floor and takes its load straight down.
Fixing into your actual walls
This is the step most guides get wrong for readers outside North America.
If your walls are stud partitions, find the studs and drive your fixings into the timber. If your walls are solid brick or block — which most walls in Pakistan are — forget studs entirely. Use proper expanding anchors rated for the load, drilled into the block itself and not into the plaster skim. Plaster will hold a picture. It will not hold a wardrobe full of winter clothes.
Either way, work out where your sockets, switches and skirting fall before you commit to a layout.
Tools and materials
Tools
Drill / driver
Circular saw and a rip guide (a straight batten clamped to the sheet works)
Mitre saw, or the circular saw again
Pocket hole jig
Brad nailer or stapler — optional
Stud finder, or a masonry bit and anchors
Materials
(4) sheets 4′×8′ ¾″ plywood (1220 × 2440 mm, 18 mm)
(1) sheet ¼″ plywood for drawer bottoms (6 mm)
(4) pairs 14″ (350 mm) drawer slides
(2) dowel rods, 1¼″ (32 mm) diameter × 72″ (1830 mm)
Wood glue
1¼″ (32 mm) pocket hole screws
1¼″ (32 mm) wood screws
(15) #8 × 2½″ (63 mm) screws, or masonry anchors to suit your wall
Edge banding — optional, but it is what makes it look bought rather than built
Handles or knobs
On the plywood: use cabinet-grade, hardwood-faced sheet, not construction ply. Construction ply has voids in the core that show at every cut edge, and the face is rarely flat enough to take a finish. Pay the difference at the merchant; you will spend it three times over in filler otherwise.
Cutting full sheets accurately is most of the battle. We have written that up separately in how to cut plywood without splintering — worth reading before you break down the first sheet, because a torn face veneer cannot be sanded out.
Step 1: The double-rail hanging cabinet
Start with the simplest box. Everything in this system is ¾″ ply except the drawer bottoms.
Cut two sides, two shelves and two back support strips. Edge band the front edges of the sides and shelves now, while they are still loose and easy to handle. It is far more awkward once the box is together.
Assemble with pocket holes and screws. The top shelf sits between the sides, flush with the top edge. The second shelf goes in partway down. Both back strips run the full width — one under each shelf — and these are what you screw through when you fix the cabinet to the wall, so do not skip them or make them thin.
Then fit the two rails, one under each shelf, secured with screws through the outside of the sides.
Where you put that middle shelf is the only real decision in this cabinet, and it comes down to what you actually hang: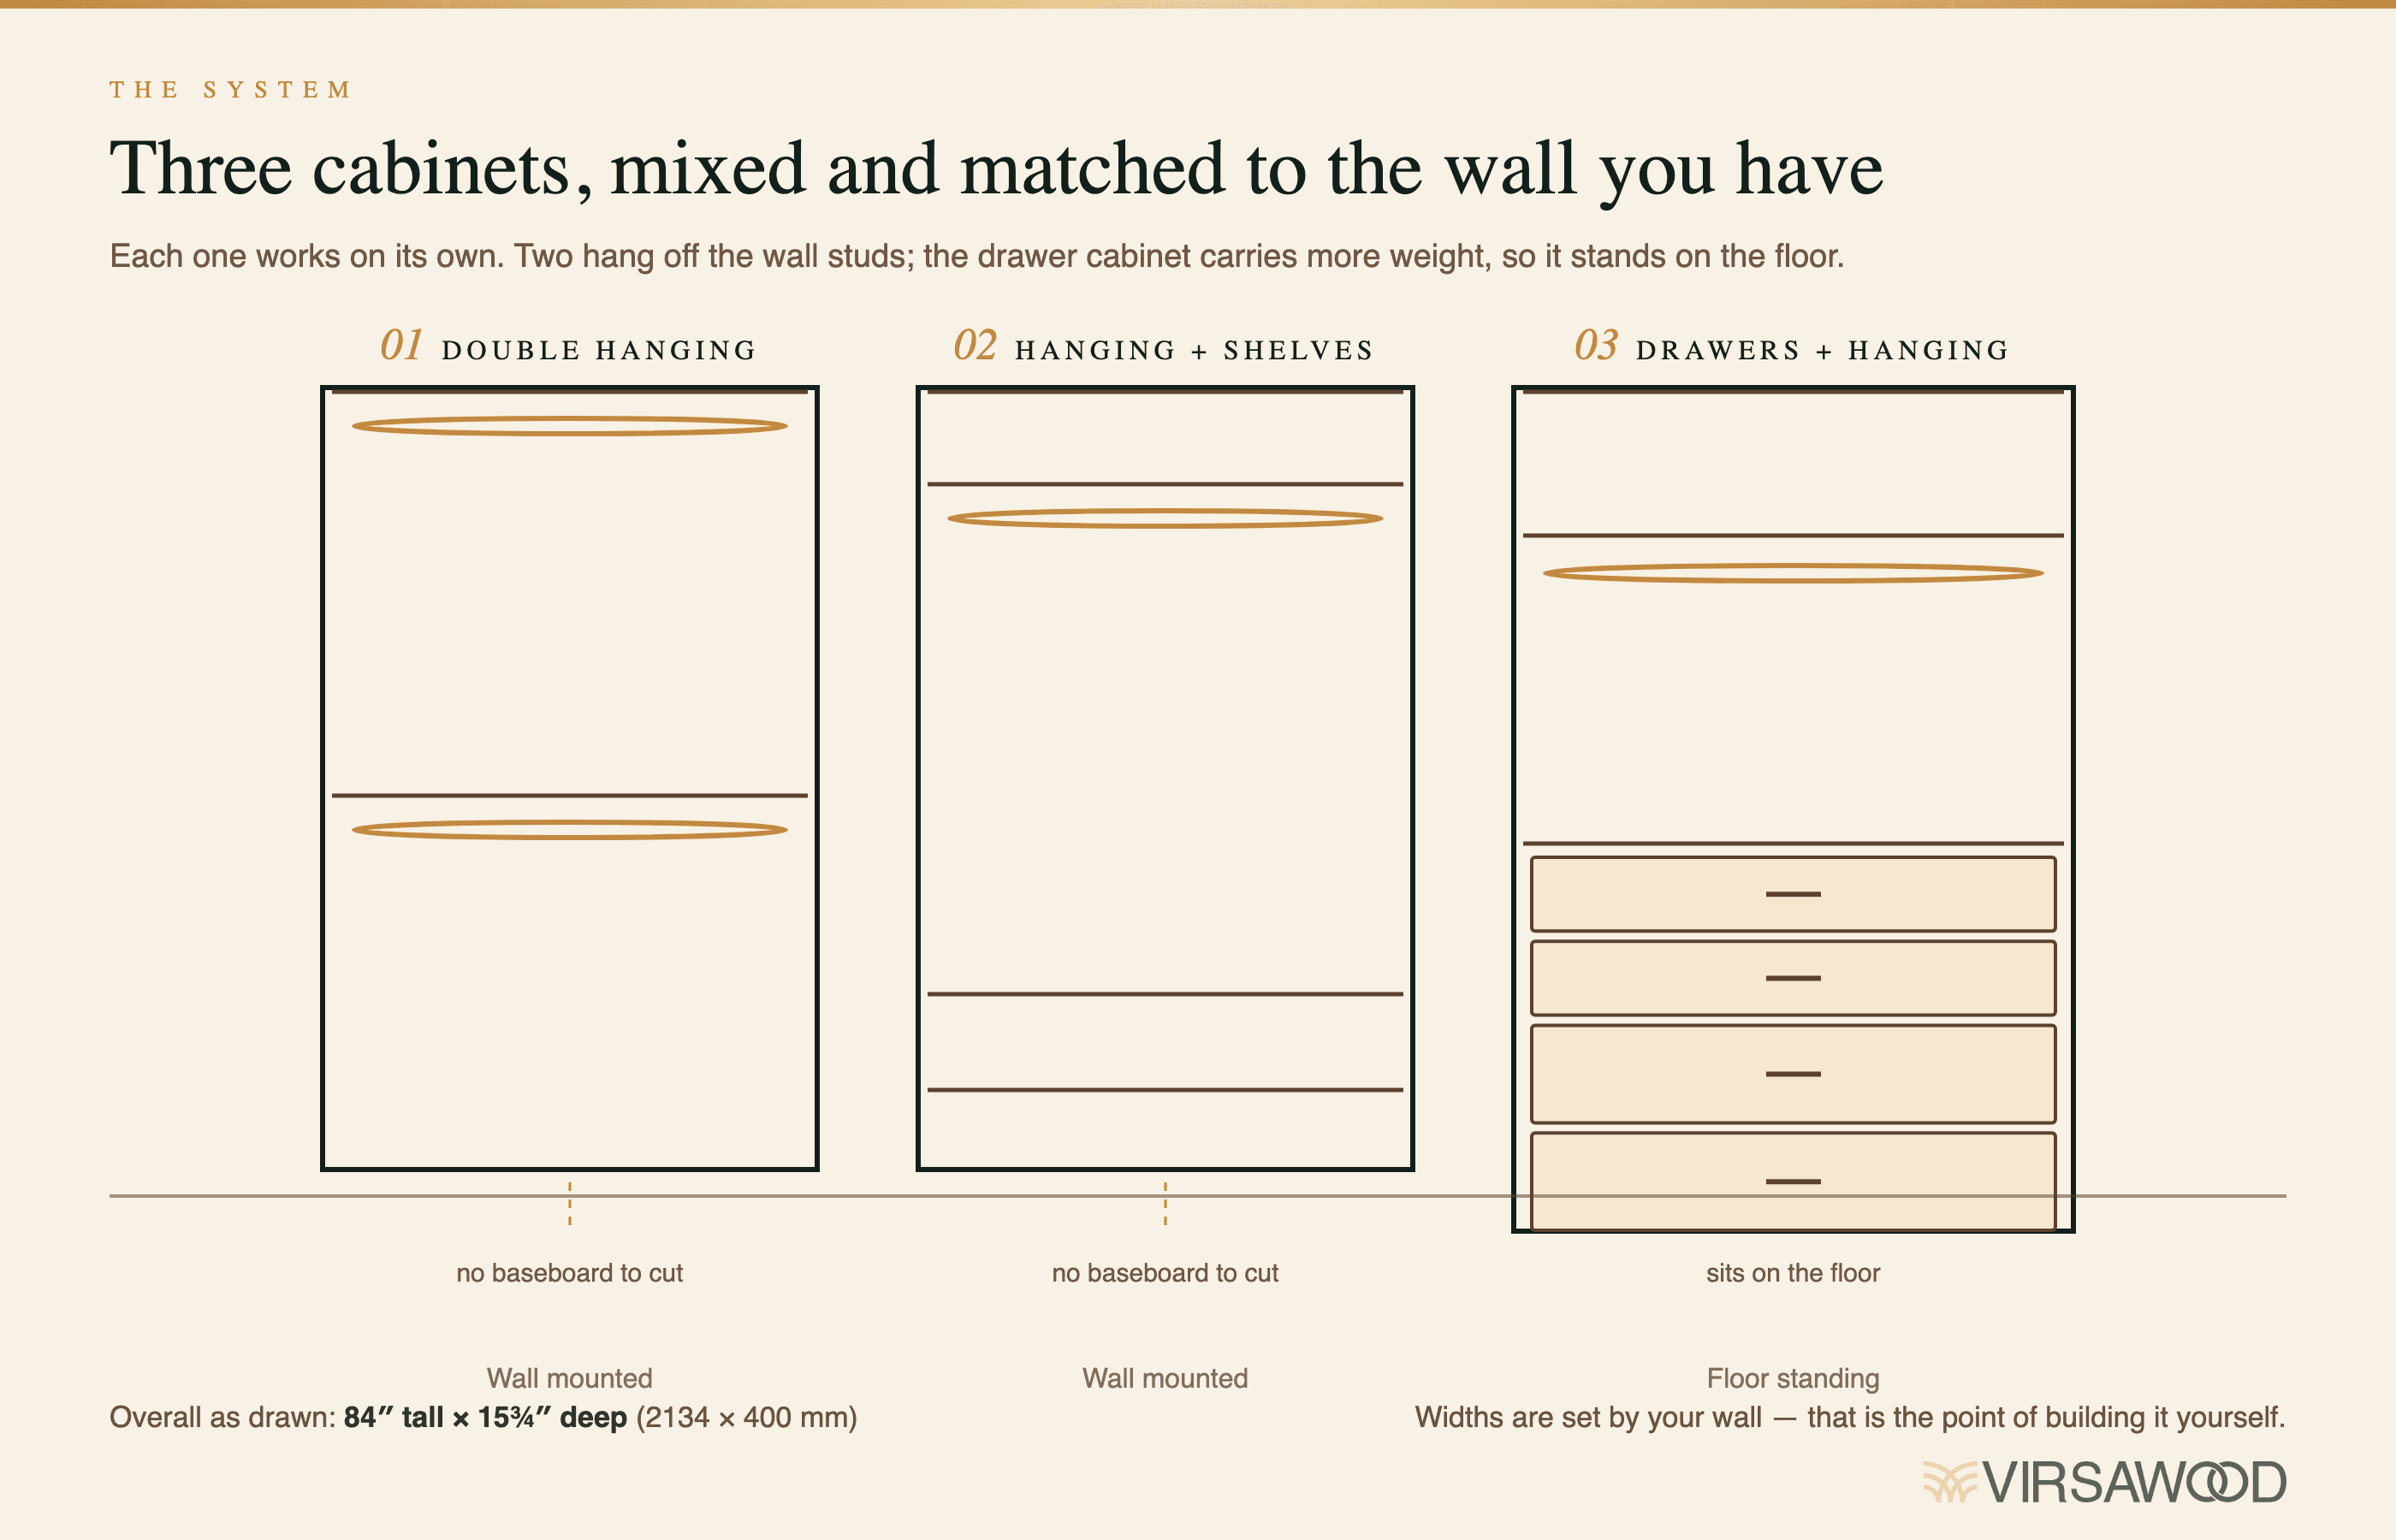
Double hanging only works for short garments. Two 40″ (1015 mm) sections stacked will take shirts, kurtas and folded trousers comfortably. Nothing longer will fit in either half, so if most of what you own is full length, build the single-rail cabinet instead and put the shelves elsewhere.
Step 2: The drawer cabinet
This is the most involved of the three, though only because drawers take longer, not because they are difficult.
Cut two tall sides, three shelves and four strips. Make the sides 84″ (2134 mm) rather than the full 8′ sheet height — a 7′ panel will stand up inside an 8′ room, and an 8′ panel will not. You cannot tip a full-height panel upright in a room with a normal ceiling, and finding that out with the glue open is a bad afternoon.
Of the four strips: one is the back support, two support the bottom, and one is the toe kick.
Edge band, then assemble with pocket holes and screws exactly as before. The cabinet ends up with drawers at the bottom, a hanging section in the middle and an open shelf at the top for the things that do not hang — jumpers, folded jeans, bedding.
Then fit four pairs of 14″ (350 mm) slides into the lower section. Space them for two shallow drawers over two deep ones. Shallow drawers are for socks, scarves and jewellery; deep drawers are for bulk. A cabinet of four identical drawers is much less useful than it looks.
Step 3: Drawer boxes and the hanging rail
Build four drawer boxes: two shallow, two deep.
The usual method is to cut a groove near the bottom edge of each side and slide a ¼″ plywood bottom into it. It is the stronger joint. But the groove has to sit above the bottom edge, and every millimetre it sits up is storage you lose across the whole drawer.
For a wardrobe, we skip it. Screw the four ¾″ sides together with pocket holes, then glue and staple a ¼″ plywood panel across the underside. You gain the full internal depth, and a drawer holding clothes is never carrying enough weight to justify the groove. In a kitchen, carrying plates, cut the groove.
Hang the boxes on the slides, then fit slab drawer fronts — plain flat panels, screwed on from inside the box so no fixings show. Flat fronts matter more in a wardrobe than anywhere else: mouldings and raised panels collect dust and lint exactly where your clothes are.
Finish the cabinet, then cut and fit the dowel rail in the middle section.
Step 4: The hanging and shelving cabinet
The last box: two tall sides, four shelves, two back strips.
The four shelves divide it into three: a short shelved section at the top, one tall hanging section in the middle, and a short shelved section at the bottom. That middle section is the reason this cabinet exists — it is where the long things go, the dresses and coats and sherwanis that will not fit anywhere in the double-rail unit.
Look at the clearance chart again before you fix those shelf positions. If you need 66″ (1675 mm) of hanging, you need to place the shelves to leave it, and there is no adjusting it afterwards without filling screw holes.
Edge band, assemble, finish, and fit the rail in the centre section.
Step 5: Installation
The wall-mounted cabinets go up first. Mark a level line at 84″ (2134 mm) for the tops of both, then screw through the back support strips into your studs or anchors. Two people make this much easier than one; the cabinets are not heavy, but holding one level while starting a screw is a three-handed job.
The drawer cabinet sits on the floor and pushes back against the wall, so you will need to cut away the skirting behind it for it to sit flush. Fix it to the wall through its back strip as well — a tall cabinet with loaded drawers open at the front wants to tip, and the fixing is what stops it.
Then hang everything up and see how wrong you were about how much hanging space you needed.
Making it fit your room
None of these dimensions are fixed. Widths come from your wall, the shelf positions come from your clothes, and if you need two of one cabinet and none of another, build that instead.
If you are converting a fitted cupboard rather than building free-standing boxes, the approach is different and we covered it separately in how to turn a closet into a built-in cabinet. And if you are painting rather than staining, the MDF painting guide covers the priming that plywood edges need too.
When it is worth having built instead
This is a genuinely achievable weekend build, and we would rather you built it than bought a flat-pack that fails in four years.
But there is a point where it stops being worth your Saturday. If the run is long, if the ceiling is high, if the walls are out of square — and in older houses here they usually are — the setting out takes longer than the building, and a wardrobe that is 15 mm out at one end will show at every door gap along the run.
That is what we do. Virsa Wood has been building fitted wardrobes, kitchens and solid wood furniture in Pakistan since 1974, made to the room and installed by people who have scribed a lot of cabinets to a lot of crooked walls.
Either way, the same rule holds: build it from material that is worth the hours you put into it.
Common questions
How thick should the plywood be?
¾″ (18 mm) for everything structural — sides, shelves, drawer boxes. ¼″ (6 mm) is fine for drawer bottoms. Do not drop to ½″ for shelves to save money: a 900 mm shelf in 12 mm ply carrying folded clothes will sag visibly within a year, and there is no fixing it afterwards.
Do I need edge banding?
Structurally, no. Visually, it is the single thing that decides whether the finished job reads as furniture or as a plywood box. A raw ply edge shows its core layers, takes finish unevenly, and chips. Banding is cheap and goes on with a household iron.
Can I use MDF instead?
For the carcass, yes, and it takes paint better. But MDF is heavier, holds screws far less well in edge grain, and sags more over a span. If you are wall-mounting cabinets, that weight difference matters. For a wardrobe you are hanging on a wall, plywood is the better choice.
Building something bigger?
We make fitted wardrobes, kitchens, panelling and solid wood furniture to order, and we work across Lahore and Islamabad. If you have a room, a rough idea and no drawings, that is a normal place to start. Call or WhatsApp +92 311 5254868, or see more at virsawood.com.
Enjoyed this?
Follow Virsa Wood on Google
Mark us as a preferred source and our stories on wood, craft and interiors will show up more often in your Google Search results.
Add as a preferred source