How to Waterproof & Seal MDF: 3-Step Guide
Before reading the Blog noted that One wet sponge on an unsealed shelf can swell a cabinet job for good. Bare MDF soaks up water fast, and once it swells, it doesn’t go back.
Is MDF Waterproof?
Quick answer:No, MDF isn’t waterproof. How to waterproof MDF in 3 steps: prime with a shellac or oil-based primer, apply two to three coats of oil-based polyurethane, and let it cure 48 to 72 hours. Seal edges first, since they absorb water fastest.
Option 1: Start With Moisture Resistant MDF
Moisture Resistant MDF is made with water-repellent resins, so it handles humidity in kitchens, bathrooms, and laundry rooms better than standard MDF. It’s the cleanest choice for vanities, cabinet doors, and trim near sinks. For cabinet shops running volume, it also skips the sealing labor entirely.
It still belongs in splash zones, not spots with standing water.
Option 2: How to Seal MDF in 3 Steps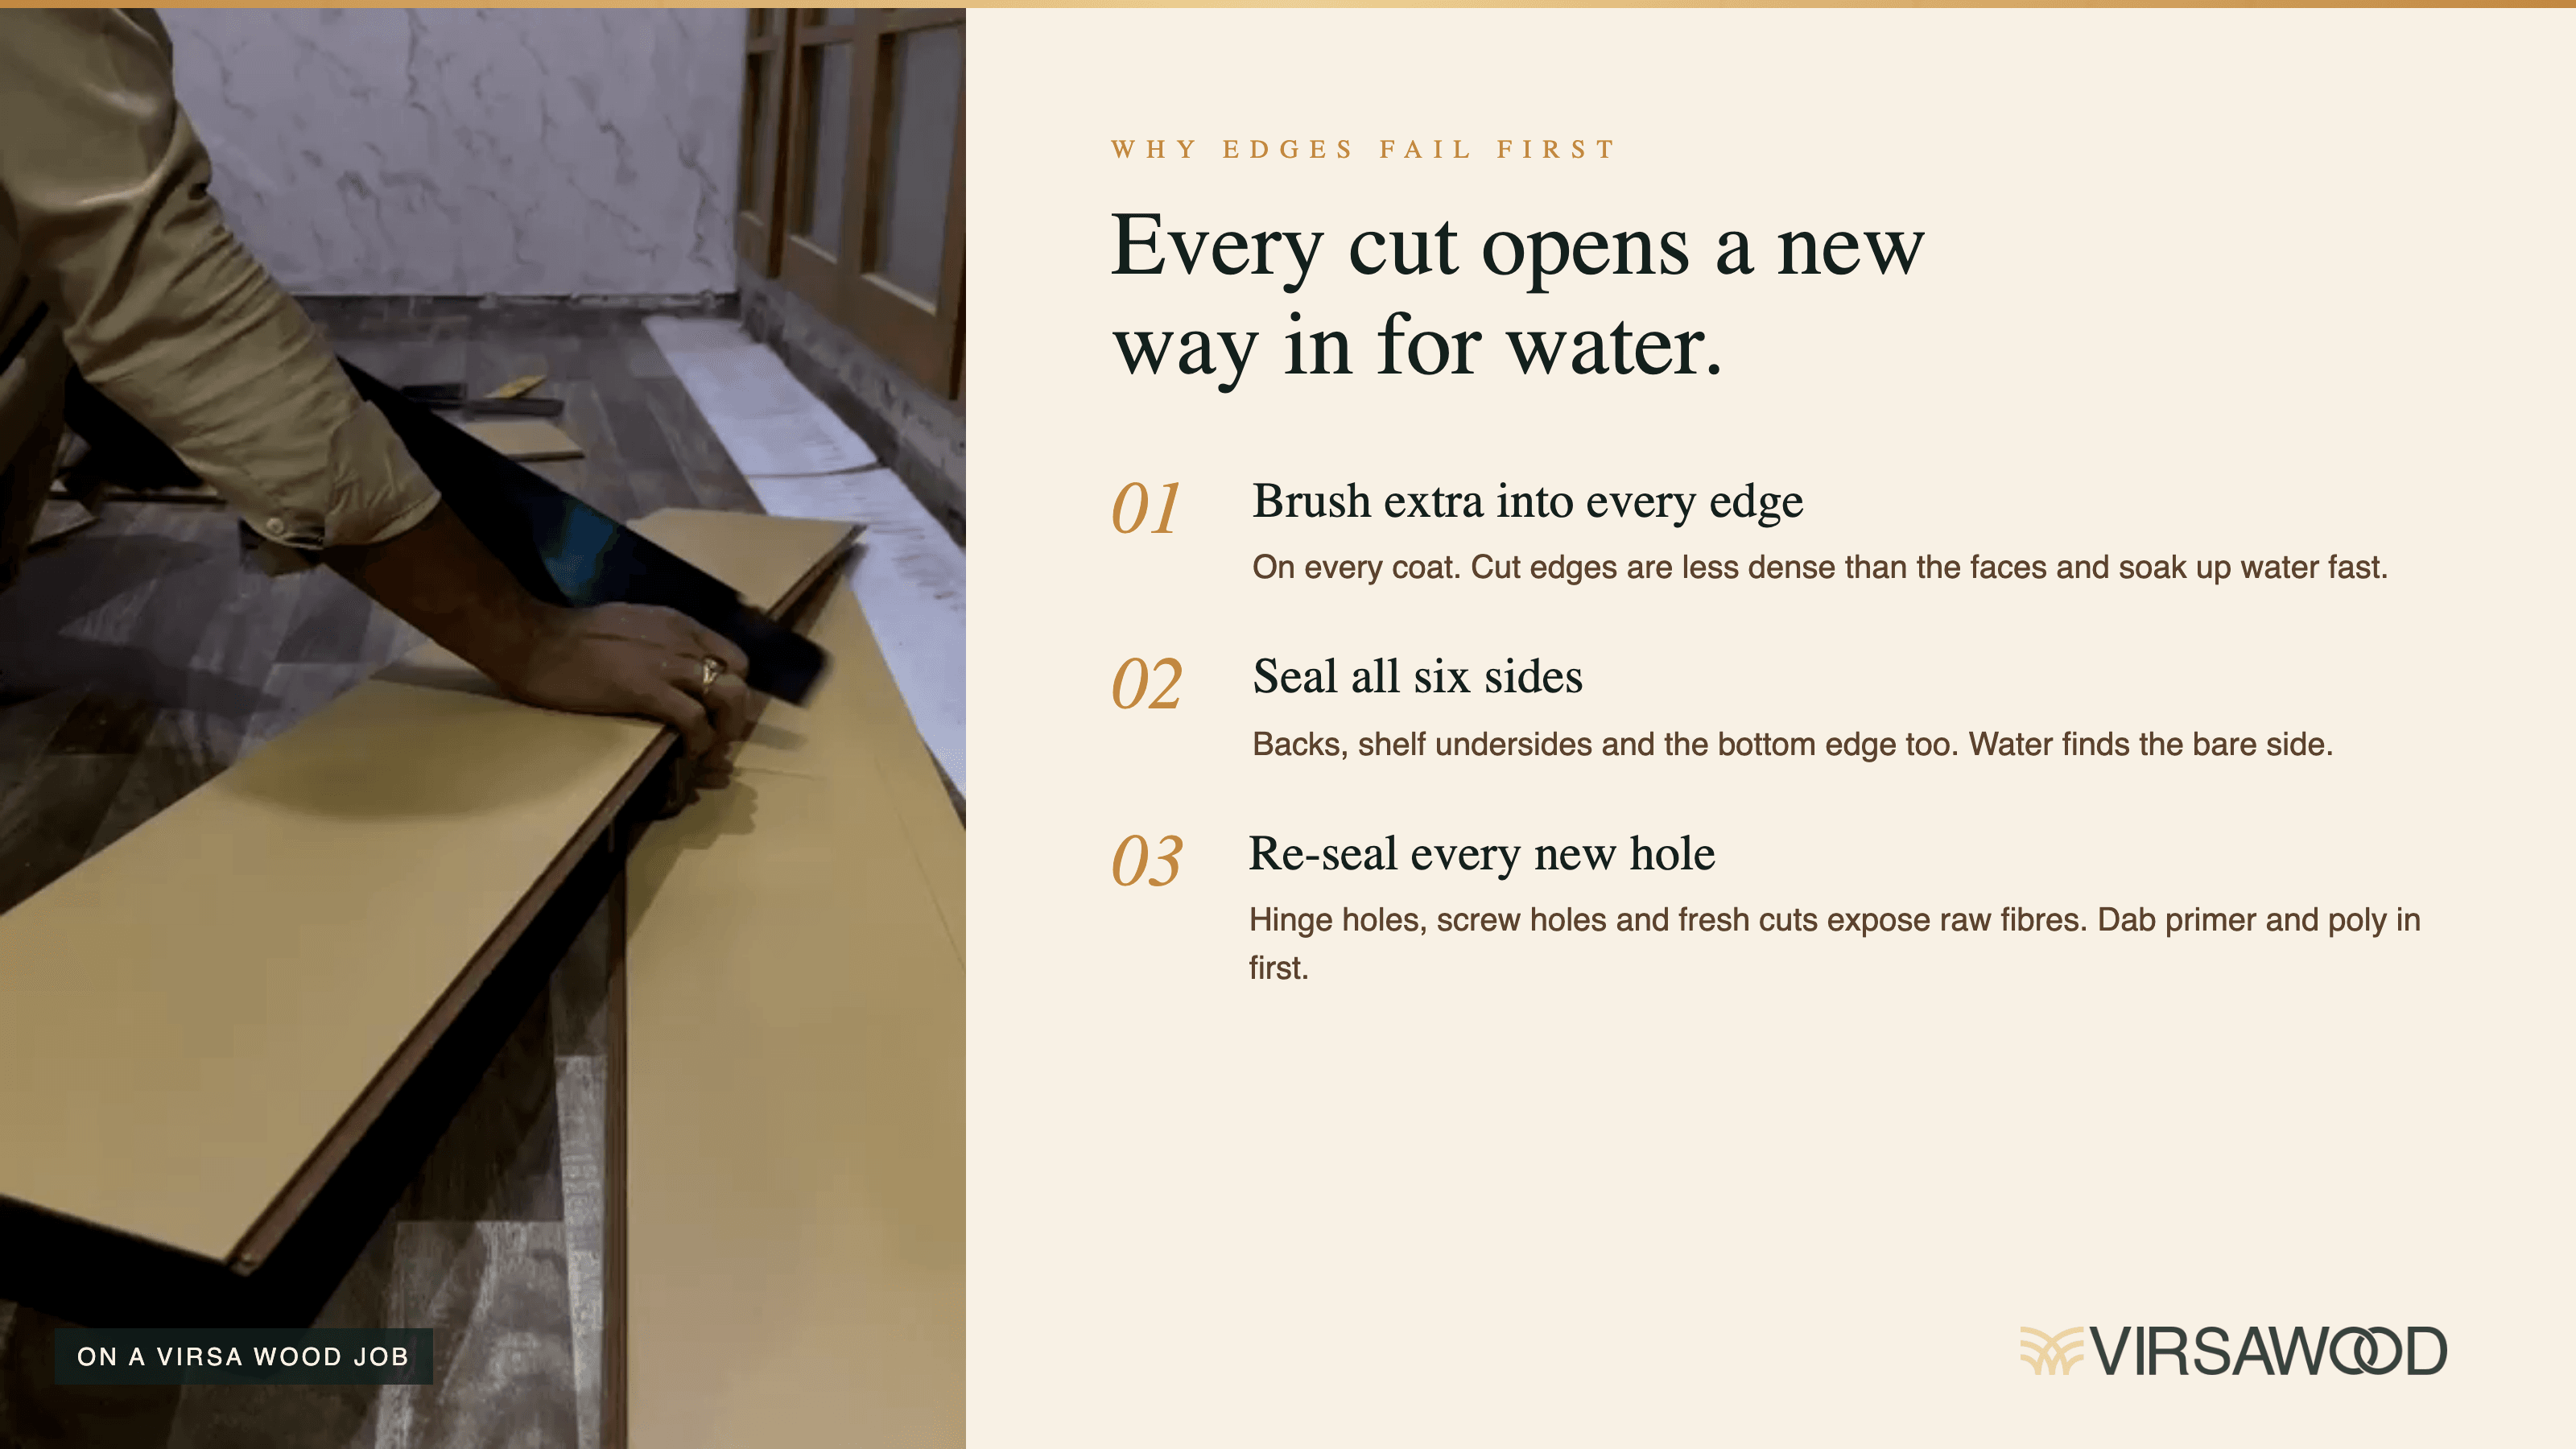
What You’ll Need
- Shellac-based or oil-based primer
- Oil-based polyurethane
- Foam roller, plus a brush for edges
- 220-grit sandpaper
- Tack cloth or a damp rag for dust
Step 1: Prime With a Shellac or Oil-Based Primer
Roll the flat faces with a foam roller and brush the edges and corners. Water-based primer raises MDF fibers, especially on cut edges, so skip it here. Let it dry per the label, usually 1 to 2 hours. Skipping primer is a common failure point.
Step 2: Apply Two to Three Coats of Oil-Based Polyurethane
Avoid water-based polyurethane. It raises MDF fibers and doesn’t block moisture as well. Let each coat dry, usually about four hours, then sand lightly with 220-grit and wipe off the dust before the next coat. Each extra coat adds protection.
Step 3: Let It Cure Before Installing
Give the panel 48 to 72 hours before it goes into a wet zone. Oil-based poly keeps hardening for weeks after that, so avoid heavy wear for the first couple of weeks.
Painting instead of clear coating? Our guide to painting MDF covers primer and paint choices.
Why Edges Fail First (And How to Stop It)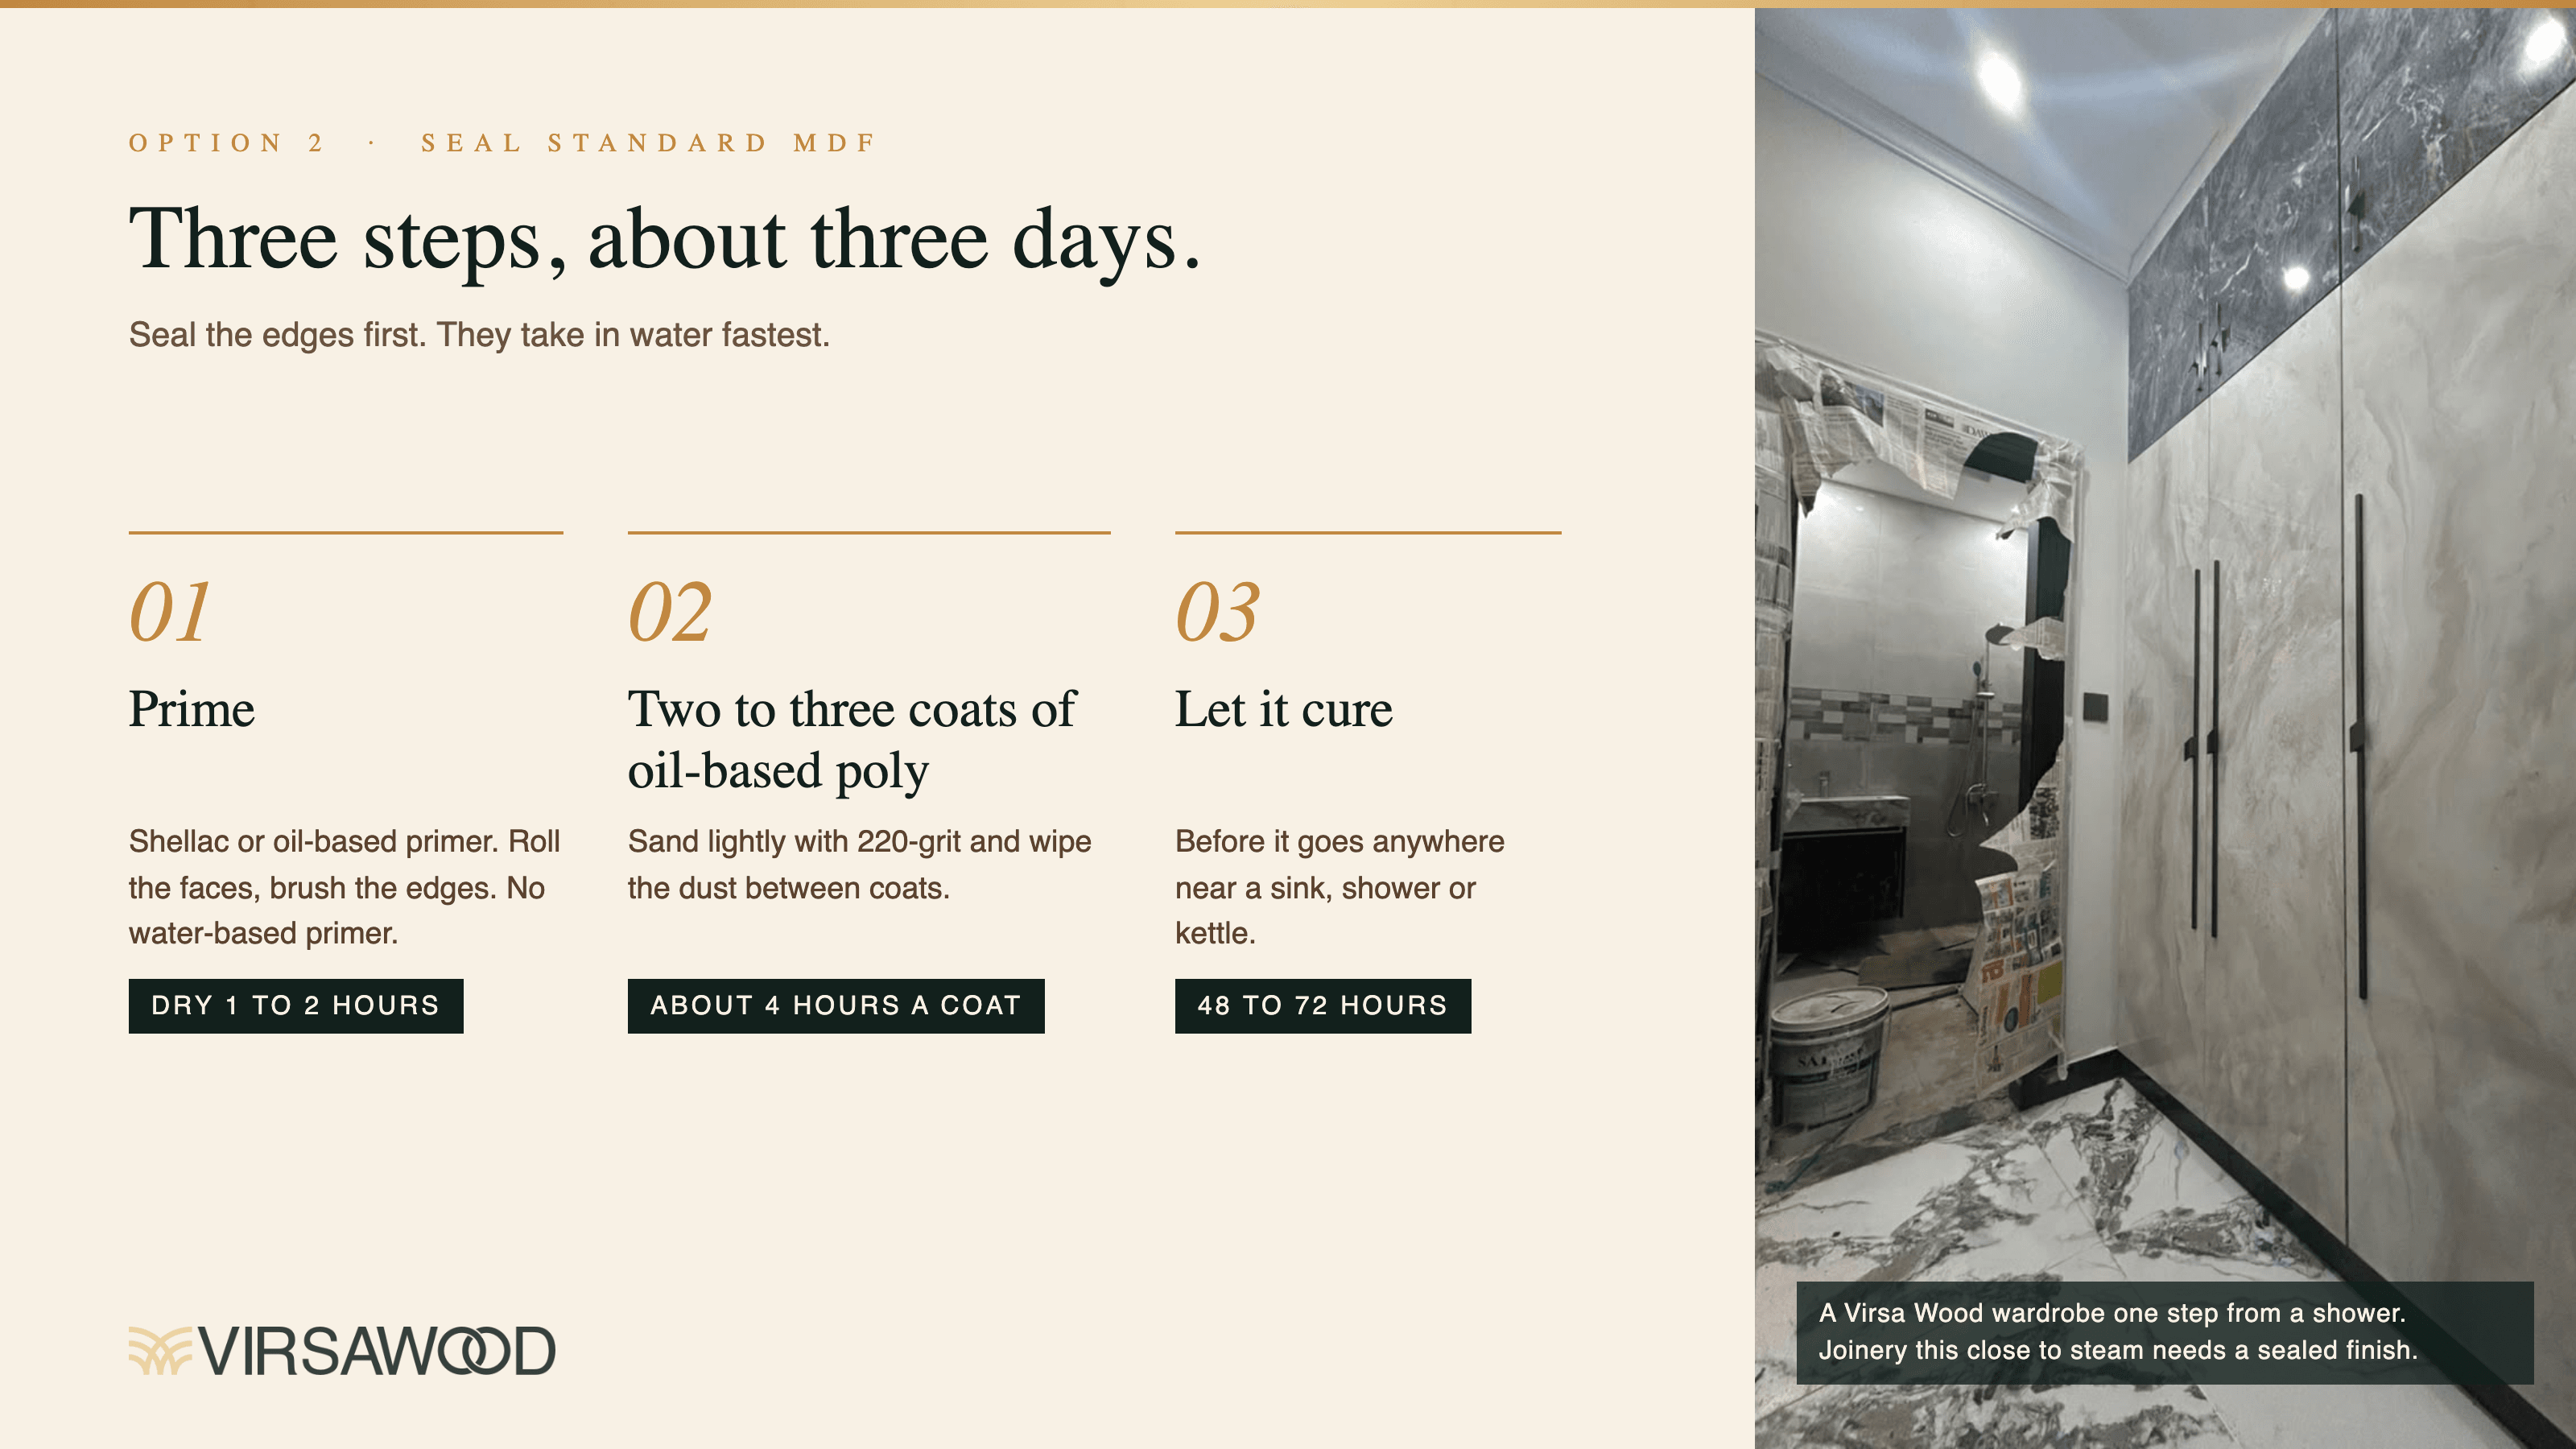
MDF edges are less dense than the faces, and the open fibers take in water fast. That’s the trade-off for the smooth, paint-ready faces that make MDF so popular for cabinets and trim. Brush extra product into every edge on every coat. For a factory-like seal, cap cut edges with edge banding.
Common MDF Sealing Mistakes
Sealing only the faces. Water finds the bare back or a cut edge. Seal all six sides, including shelf undersides and the backs of cabinet panels.
Cutting or drilling after sealing. Every new cut, hinge hole, or screw hole exposes raw fibers. Dab primer and poly into them before installing hardware.
Laying it on thick. Heavy coats of oil-based poly dry slowly and can stay soft. Two or three thin coats beat one heavy one.
Frequently Asked Questions
Do MDF cabinets need sealing?
Yes. Kitchen and bathroom humidity alone can swell untreated edges over time, even without splashing.
Can you waterproof MDF for outdoor use?
No. Even sealed MDF breaks down outside once rain and sun get through the finish. For exterior trim and panels, use exterior-grade MDF or marine-grade plywood.
Can you seal MDF with PVA glue?
A coat of wood glue thinned with water can close up MDF edges before priming. Sand it lightly once it’s dry. It isn’t a waterproof finish on its own, so prime and topcoat over it.
Can you use silicone caulk on MDF?
Yes, at joints where MDF meets a sink, tub, or backsplash. Don’t coat whole panels with it, though. Paint and poly won’t stick to silicone.
Building a Kitchen or Vanity Near Water? Ask Virsa Wood
Virsa Wood builds kitchens, vanities and wardrobes for wet and dry rooms, in solid wood and in MDF. Not sure whether your job needs Moisture Resistant MDF or sealed standard MDF? Call or WhatsApp our team at +92 311 5254868, or see our work at virsawood.com, and we’ll help you choose.
Enjoyed this?
Follow Virsa Wood on Google
Mark us as a preferred source and our stories on wood, craft and interiors will show up more often in your Google Search results.
Add as a preferred source